

How to Load Elk Quarters Solo: A Step-by-Step Guide
Table of Contents
- How to Load Elk Quarters Solo: Field Quartering and Prep
- How to Pack Out an Elk Alone: Frame Loading and Weight Distribution
- Preventing Meat Spoilage in the Field: Cooling and Hanging
- Solo Elk Hunting Gear List: Essential Equipment for Heavy Loads
- Ergonomic Loading Sequences for Solo Hunters
- Post-Load Stabilization and Emergency Extraction Protocols
- Conclusion: Mastering the Solo Elk Quarter Load
- Frequently Asked Questions
Last Updated: October 4, 2026
How to Load Elk Quarters Solo: Field Quartering and Prep
Learning how to load elk quarters solo starts with a plan, a sharp knife, and the right frame.
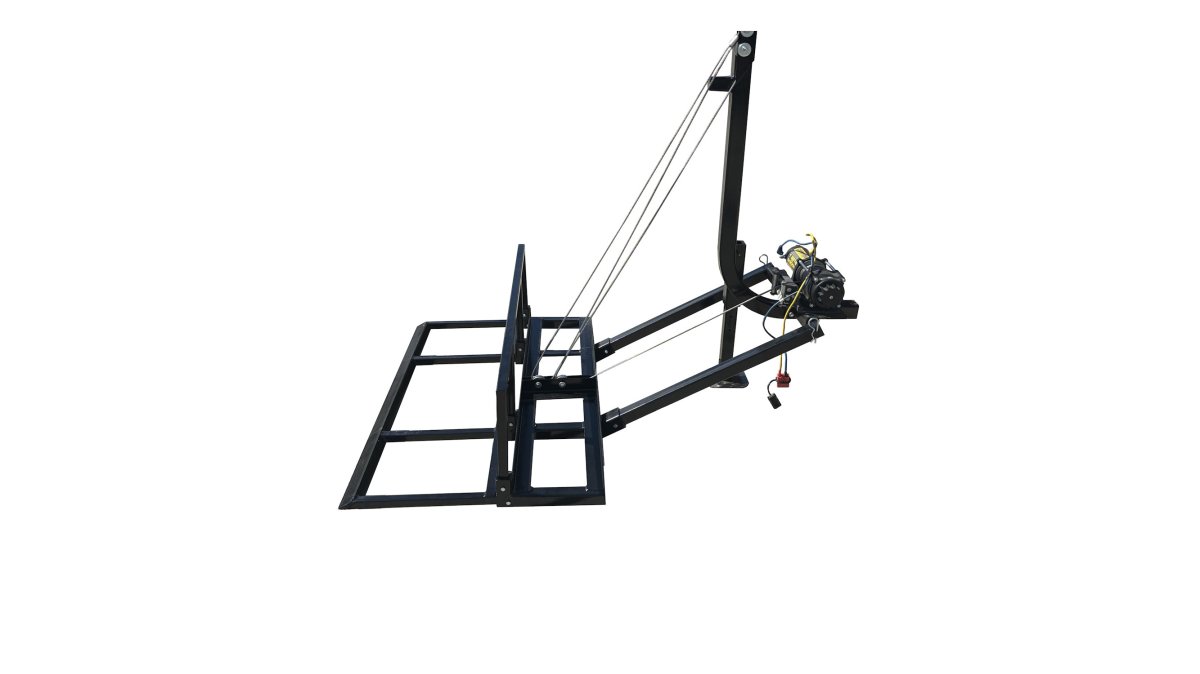
At Elk Hauler, we build gear for exactly this moment. Our UTV attachment lets one person recover elk, moose, and deer without dragging anything, but only if the meat is quartered and bagged correctly.

The core rule of solo quartering: work downhill, keep the animal clean, and never lift more than you have to.
Quartering Techniques for a Solo Hunter
Quartering breaks a downed elk into four manageable sections: two front quarters, two hind quarters, plus backstraps and tenderloins.
For a solo hunter, the goal is speed and cleanliness:
- Position the elk on its side, downhill if possible
- Cut along the spine and ribs
- Remove the front quarter first (lighter and easier to control)
- Roll the animal and repeat on the other side
- Take the hind quarters last, working the ball joint carefully
- Remove backstraps and tenderloins
- Leave evidence of sex and species attached where regulations require it
A sharp knife matters more than strength. A bone saw helps with the pelvis and sternum, but a good blade handles most joints.
Using Game Bags Effectively
Game bags do three jobs: keep flies off, let air circulate, and give you something to grab. Synthetic bags breathe better than cotton and dry faster. Bring one bag per quarter plus one for trim.
How to bag a quarter without trapping heat:
- Lay the bag flat and slide the quarter in
- Pull the fabric tight but not compressed
- Hang or prop the bag so air moves around all sides
If you're hours from the truck, get the meat into bags and into shade fast. Warm meat in a sealed bag is a spoilage clock ticking.
How to Pack Out an Elk Alone: Frame Loading and Weight Distribution
Packing out an elk alone is a physics problem, not a strength contest. A well-loaded frame feels lighter than a badly loaded one at the same weight.
The biggest mistake solo hunters make is trying to lift a quarter. Don't. Roll, slide, or drag it onto a frame already at hip height, gravity does the work, your spine just guides the load.
Loading the Pack Frame
Load the heaviest weight high and close to your spine, keeping the load's center of gravity near your own. A freighter frame with a solid shelf is the right tool.
Here's the loading order we use:
- Set the frame at hip height first. Lay it on a log, rock, cut bank, or downhill slope so the shelf sits at your belt line. You never lift the quarter off the ground.
- Roll or slide the heaviest quarter onto the shelf, high and centered. A hind quarter runs 60-80 lb on a mature bull; a front runs 40-55 lb. Load the heaviest first so you're not fighting an unbalanced frame.
- Add the second quarter beside it, matching weight left to right. Pair a hind with a front so both sides carry equal weight. A 10 lb difference is noticeable on a sidehill; 20 lb is a fall risk.
- Slide lighter items (backstraps, tenderloins, gear) into gaps low and outward. Dense items high and close; bulky, light items low and away from your spine.
- Tighten every compression strap before you stand. They stop the load settling and shifting on the first kilometre. Snug them bottom, middle, top.
- Back into the shoulder straps with the pack still on the raised surface. Squat in front, slip one arm in, then the other, and stand by pushing through your legs. Never deadlift the pack off the ground.
- Adjust load lifters last, once the pack is on your back. They only work when the pack is loaded and worn, setting them beforehand is guesswork.
Weight Distribution and Balance
Balance beats brute force. Aim for equal weight on both shoulders and the load sitting high on your hips, not hanging off your shoulders.
Check these before every step:
- Hip belt snug and centered on your hip bones, not your waist
- Shoulder straps comfortable, not cutting in
- Sternum strap level across your chest
If the load shifts when you turn, stop and re-tighten. A shifting load on a sidehill is a fall waiting to happen.
Quick field test: stand still, lean forward 10 degrees. If the pack pulls you further forward, load lifters are too loose; if it pushes you backward, too tight.
Preventing Meat Spoilage in the Field: Cooling and Hanging
Preventing meat spoilage in the field comes down to three things: heat, moisture, and air. Remove heat, keep the surface dry, and let air move, miss any one and you're racing the clock.
Bacteria multiply fastest in warm, wet, still conditions. Your whole field strategy should fight all three.
Hanging Meat to Prevent Spoilage
Hang quarters in shade with good air circulation, spaced apart so they don't touch. If you can't hang them, prop them on logs or rocks so air moves underneath. In warm weather the window is shorter, cool the meat fast and get it to a cooler or processor sooner.
For a solo hunter, hanging meat means you're not moving it, so a plan for extraction matters as much as a plan for cooling.
Solo Elk Hunting Gear List: Essential Equipment for Heavy Loads
Your solo elk hunting gear list should be short and ruthless. Every extra ounce you carry in is an ounce you can't carry out.
Core gear for a solo pack-out:
- Sharp knife plus a backup and a sharpener
- Bone saw for pelvis and sternum
- Four to six game bags
For UTV-based recovery, add the Elk Hauler attachment. It mounts to most utility UTVs with a receiver hitch, handles up to 700+ lb or your UTV's rated capacity (whichever is lower), and lets one person load and move game without lifting it onto a rack.
Situation |
Best Tool |
Why |
|---|---|---|
Deep backcountry, no road access |
Freighter frame pack |
Carries weight on your hips, not shoulders |
UTV access within a few km |
Elk Hauler UTV attachment |
One-person loading, no manual lift |
Short, flat pack-out |
Frame pack plus trekking poles |
Simplest option for easy terrain |
Steep sidehill |
Frame pack, tight hip belt |
Balance and stability matter most |
Ergonomic Loading Sequences for Solo Hunters
Most pack-out injuries happen in the first 30 seconds, when you lift a heavy quarter off the ground. The fix is a loading sequence that never asks your back to lift:
- Position the pack frame on a log, rock, or slope so it sits at hip height
- Roll or slide the quarter onto the frame instead of lifting it
- Load the frame while it's still on the ground or a raised surface
- Back into the shoulder straps with the pack resting on a raised surface
- Stand by pushing through your legs, not your back
- Tighten everything, then take three slow steps to test the load
The key move is loading the pack before you wear it. Getting a loaded pack onto your back from the ground is where most solo hunters hurt themselves.
With a UTV, the sequence changes entirely: insert the Elk Hauler into the receiver, secure it with the hitch pin, connect the wiring, and load game without lifting it to shoulder height.
Post-Load Stabilization and Emergency Extraction Protocols
Once the load is on, the next job is keeping it stable and getting it out safely. Two things cause most solo pack-out problems: a shifting load and no backup plan.
Post-Load Stabilization: The First Kilometre
A pack that felt perfect in camp will feel wrong within 200 metres, meat settles, straps stretch, shoulders compress. Plan to stop and re-tune.
The re-tighten cadence we use:
- At 100 metres: Stop, set the pack on a log or rock (don't take it off standing), and re-snug the hip belt and compression straps, the highest-value adjustment of the whole hike.
- At 500 metres: Check load lifters and sternum strap; if the top has sagged backward, tighten the lifters a notch.
- At 1 kilometre: Full reset. Re-check left/right balance by standing still and noticing which shoulder bears more weight; shift contents if needed.
Signs your load is wrong and needs immediate adjustment:
- One shoulder aches more than the other (side-to-side imbalance)
- The pack pulls you backward on descents (load lifters too loose)
- The hip belt rides up onto your stomach (belt too loose or too high)
Emergency Solo Extraction: When You Can't Carry It Out
The hardest call in a solo pack-out is admitting the load is too heavy, the terrain too steep, or your body done. Making that call early separates a rough day from a rescue.
Cache-and-return protocol:
- Pick a cache site with shade and airflow. A north-facing slope, dense spruce stand, or shaded rock face all work, meat needs moving air, not just darkness.
- Elevate the meat off the ground. Hang quarters from a sturdy branch at least 1.5 metres up, or prop them on logs so air moves underneath. Ground contact invites moisture and insects.
- Space quarters so they don't touch. Contact points trap heat and moisture, the two things that spoil meat fastest.
- Mark the cache with GPS and a physical marker. Drop a waypoint, then add flagging tape, a bright stuff sack, or a stacked cairn so you can find it even if your battery dies.
- Record the waypoint in two places. Write the coordinates on paper or in your phone's notes app, not just your GPS. Electronics fail.
- Hike out light. Leave the frame if you must, but take your knife, water, and first aid. Move at a pace you can sustain.
- Return with help, a UTV, or a game cart. A second person halves the trips. A UTV with a receiver-hitch game attachment can often recover the whole cache in one pass.
When to cache instead of push:
- Any back, knee, or ankle pain that changes your gait
- Darkness falling with more than 2 km to the truck
- A load you've already dropped twice
Caching works because cool, shaded, air-circulated meat keeps far longer than meat left on the ground. In mild conditions, properly cached quarters can hold a day or more while you organize recovery. Mark it well, note it twice, and come back prepared.
Conclusion: Mastering the Solo Elk Quarter Load
The hardest part of a solo elk hunt isn't the shot, it's the recovery, where most hunters get hurt or lose meat.
Elk Hauler was built for that exact moment. Our UTV attachment is engineered in Alberta, protected under U.S.
If you're tired of dragging quarters or risking your back, it's time to change how you recover game. Get started with Elk Hauler and make your next pack-out a one-person job.
Frequently Asked Questions
Can you quarter an elk without gutting it?
Yes. The gutless method is the standard for solo hunters. You skin one side, remove the front and rear quarters, then the backstrap and tenderloin, before rolling the animal and repeating on the other side. This keeps the carcass clean and avoids heavy lifting. It also lets you start cooling meat faster, which matters when you are working alone and time is tight.
How long should elk quarters hang before packing?
In warm weather, do not hang longer than necessary. Get the meat off the ground, into game bags, and into shade or a creek bed within a few hours. If temperatures are near freezing, quarters can hang overnight to firm up, which makes them easier to load and improves texture. Always prioritize cooling over aging when hunting solo in early season.
What is the best way to lift heavy game quarters alone?
Use a freighter frame with load lifters and a hip belt. Position the frame upright against a tree or rock, lean the quarter onto it, then slide your arms through the straps and stand using your legs, not your back. A pulley system or a UTV attachment like the Elk Hauler can also reduce strain when terrain allows mechanical help. Never deadlift a quarter from the ground.
How do you prevent meat spoilage during a solo pack-out?
Cool the meat fast. Quarter immediately, place quarters in breathable game bags, and hang them in shade with air circulation. Avoid stacking quarters or leaving them in direct sun. If you are using a UTV, keep quarters elevated on a rack or in a dry sack. On long pack-outs, cache meat in a cool creek bed or shaded timber and retrieve it in stages. Spoilage starts when heat and moisture trap together.